
To improve domain reliability and simplify future updates, the platform now requires all domains to use a CNAME record instead of the previously supported A record. Domains currently connected via an A record (pointing to an IP address) must be updated to use a CNAME instead.
This guide outlines the steps to update DNS settings accordingly.
Why This Change?
Using a CNAME allows Brilliant Directories to:
Minimize disruptions caused by IP changes.
Offer better flexibility and redundancy in server management.
Steps to Migrate from A Record to CNAME
1. Log in to the Domain Registrar
Access the domain management dashboard provided by the registrar (e.g., GoDaddy, Namecheap, Google Domains, etc.).
2. Open DNS or Zone Settings
Navigate to the section where the current DNS records are listed.
3. Remove the Existing A Record
Locate and delete any A record pointing the domain (often labeled @ or www) to a Brilliant Directories IP address (e.g. 54.123.45.67).
4. Add the New CNAME Record
Create a CNAME record with the following configuration:
- Host/Name: Root Domain
- Type: CNAME
- Value/Points To: Target URL (can be found under Domain Manager)
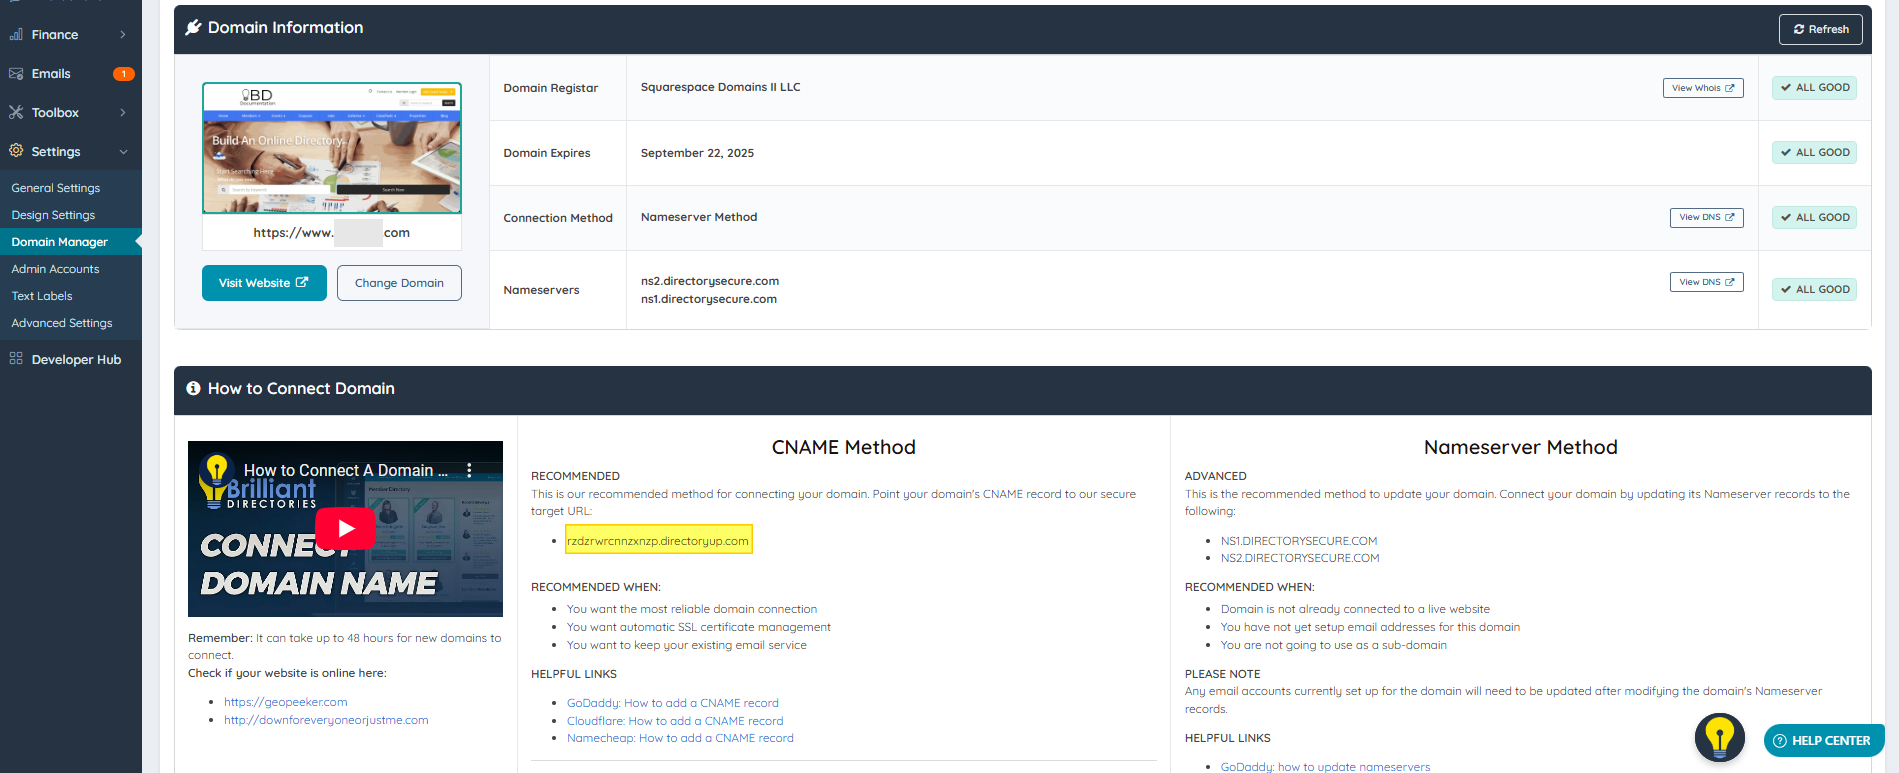
- TTL: Default value
Note: Some registrars do not allow CNAME records on the root domain (the bare domain without "www"). If yours does not, use the registrar’s ALIAS or ANAME record type for the root domain instead — it behaves like a CNAME — or reach out to our support team and we’ll help you find the best option for your registrar.
