
By default, all Brilliant Directories sites come with a specific membership plan named "Admin - Blog Contributor" . This plan is not searchable and is meant for the admin of the site to add specific content like Digital Products and Blog Articles.
The Difference Between Blog Article and Community/Member Article

To enable this post type on a membership plan go to Finance » Membership Plans - Post Publishing.
Create Blog Post
Login as any user or member that has access to the Blog Article post types.

On the left sidebar find the Blog Article post type, click on it to make a new post.

IMPORTANT
If the Website Blog Article is not included in the member dashboard, the post needs to be enabled for the membership plan in the post publishing tab: Finance » Membership Plans - Post Publishing
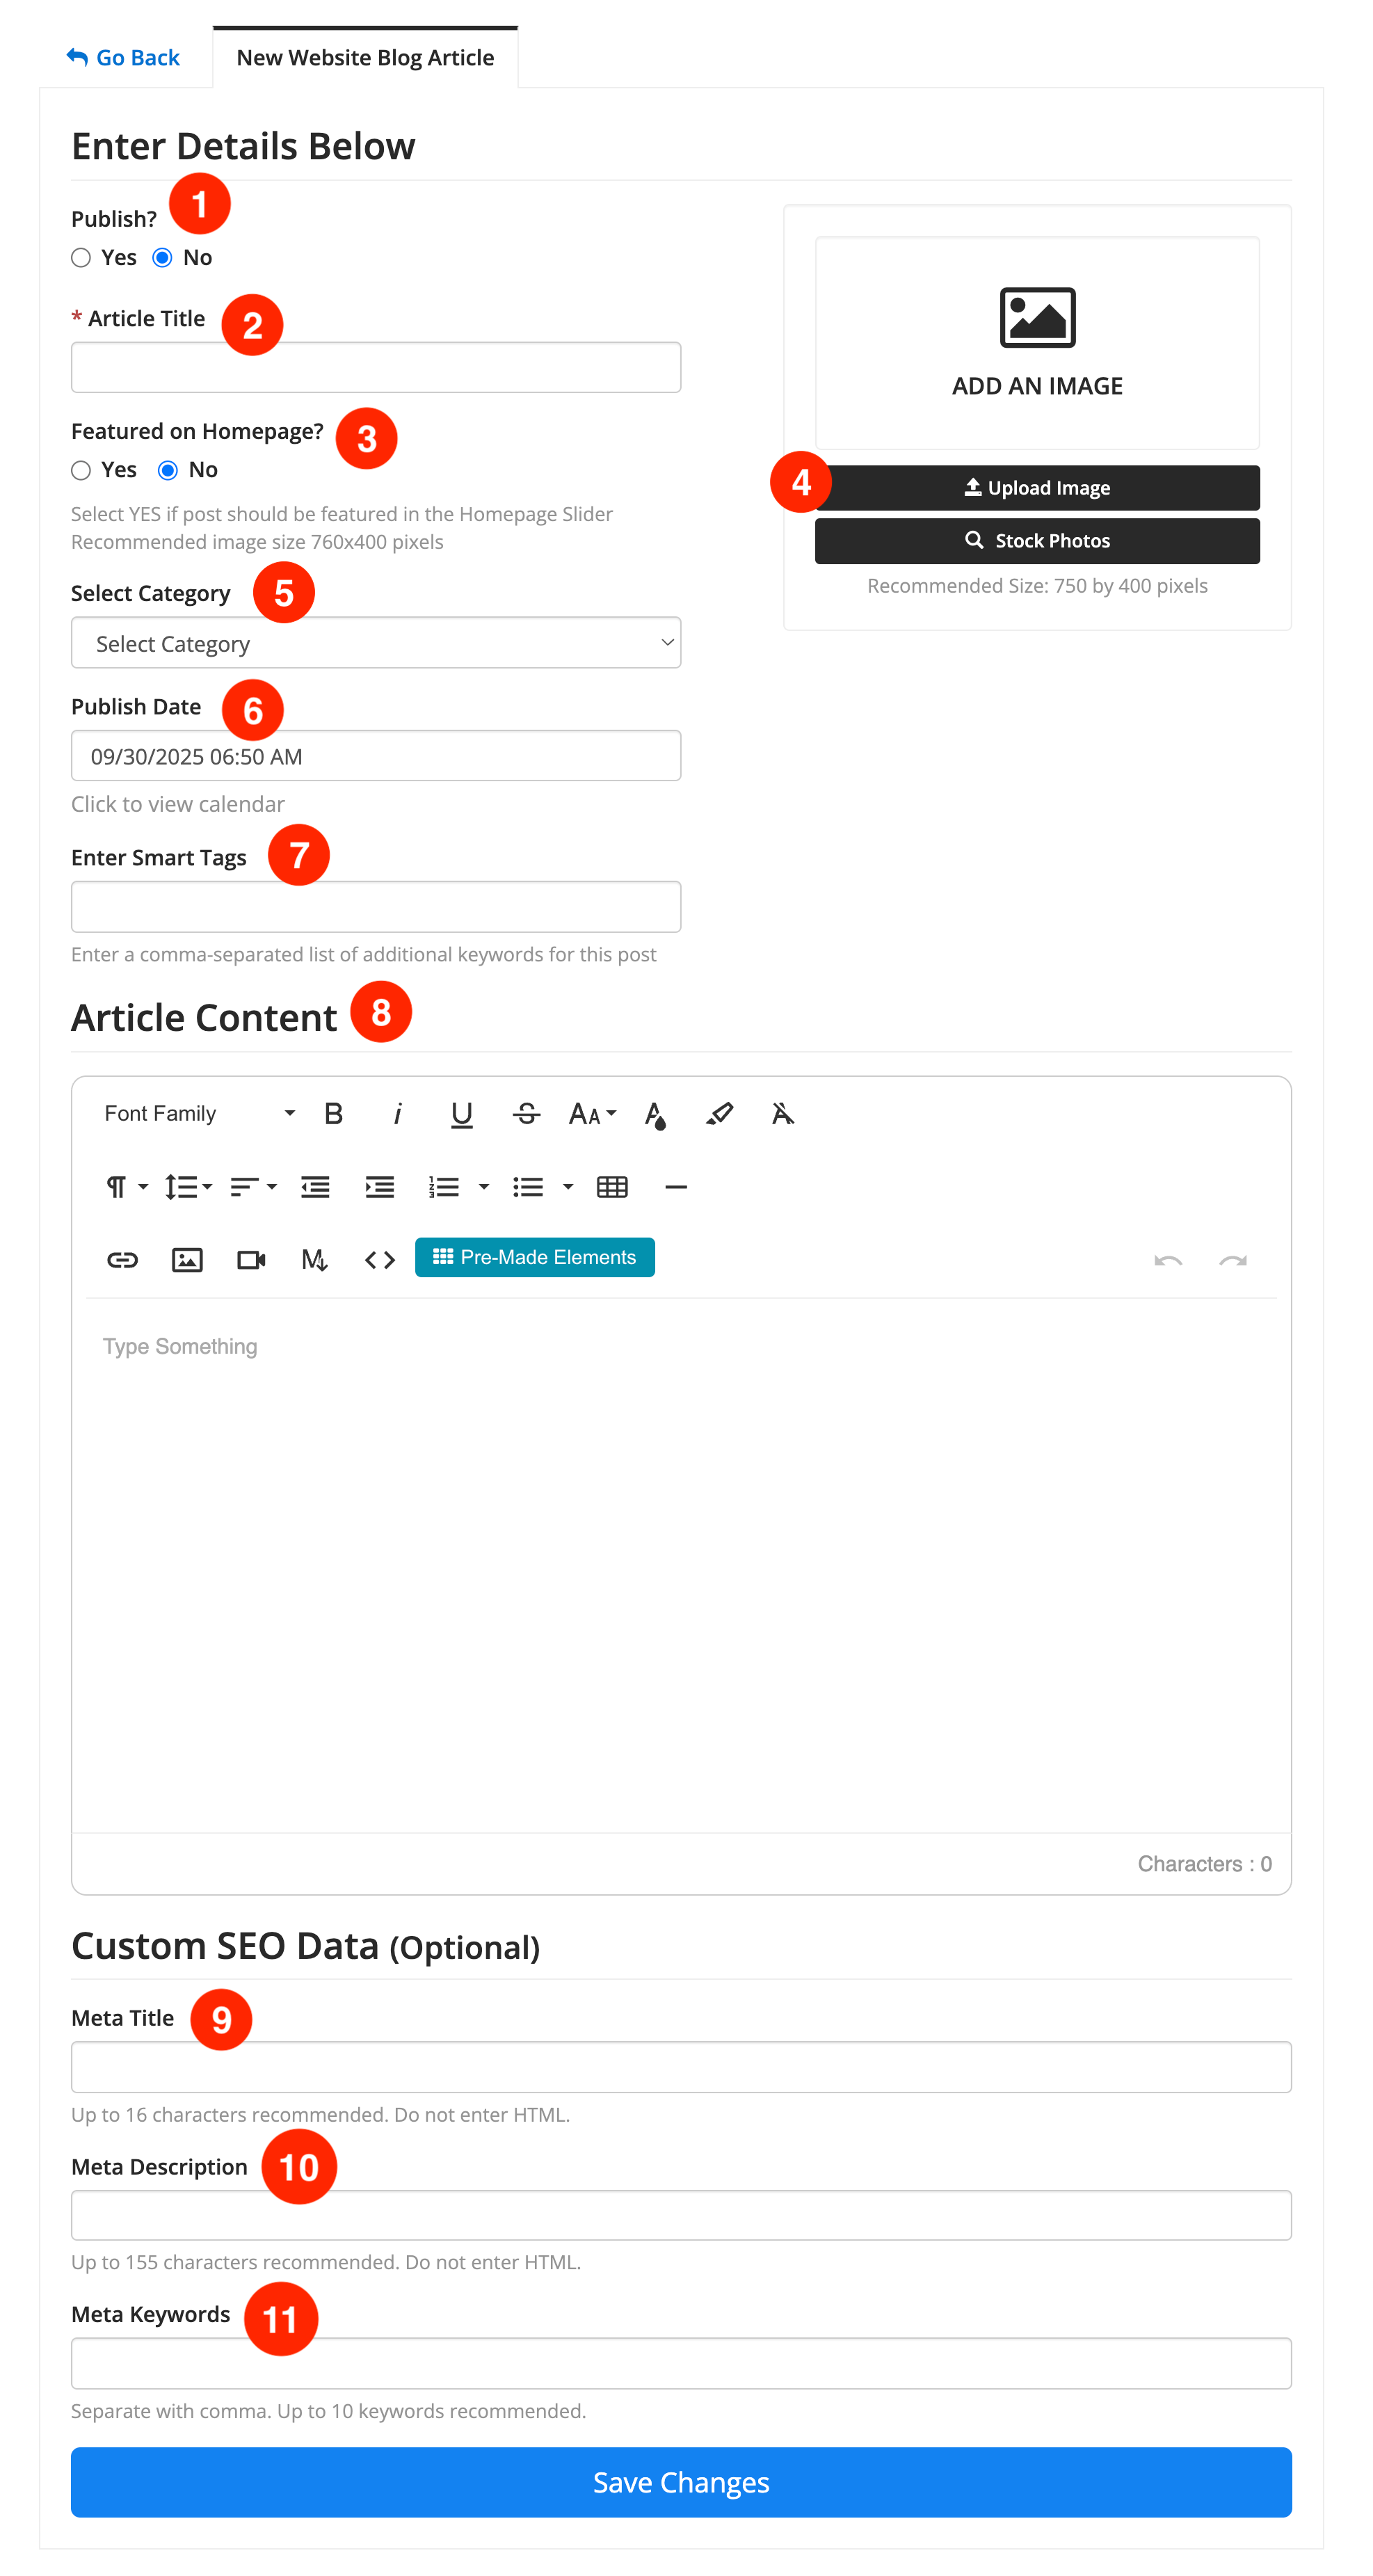
Create Blog Form
- Publish content on the site or save it as a draft.
- Add the Title of the article.
- Featured Blog Article Slider Add On needed.
- Upload an image to the article.
- Enter the category that matches the content.
- Add a date to publish the Website Blog Article.
- Enter keywords that apply. Separate with comma.
- Add content to the article. The text editor can insert images by uploading them, by URL, or from the Stock Photo Library, and offers different font types and link styles. To reuse an image already in the Media Manager, click Copy Link on it there and add it with Insert Image » By URL.
- Enter Meta Title
- Enter Meta Description
- Enter Meta Keywords
Adding Images to Blog Articles
Images uploaded through the text editor are saved in the Media Manager, inside the member_uploads folder. The article's cover image is stored with the post itself and does not appear in the Media Manager.
Because the Media Manager is the central storage tool for site images, this post type is meant for admin use only. Allowing all users to upload here could lead to unnecessary or low-quality files, so keeping it limited to admins ensures the Media Manager stays clean and reliable.
Member Dashboard Options
Different options are available on this section. For more information, please refer to the image and points shown below:

- Website Blog Articles: Will show all the blogs and display the amount of Blogs in the account.
- Add a New Website Article: Click to add a new blog. It will not display if the limit of posts has been reached.
- Entries per page: Click on the dropdown to choose how many entries will show per page (5, 10, 25 or 50 entries).
- Order of the Posts on the Page: Newest, Oldest, Updated (first), Updated (last), Start Date (first), Start Date (last).
- Filter by Status: Published, Draft or Expired.
- Filter by Keyword: Enter a desired keyword to display all blog articles that contain it.
Once the Blog Article has been created, it will display the current Status (Published, Draft, Expired).
The number of views and Bookmarks will only show if the correspondent Add Ons are active on the site.

Click on the Actions button to View, Edit, Clone or Delete the post:

Blog Post Page
Lastly, all Post Types have a designated search results page:
EG: http://yourbrilliantdomain.directoryup.com/blog

Blog Tips
We recommend watching this excellent video that covers How to Start Blogging on Your Website:
