
Many third-party tools require a tracking code on "success pages" to track sales, sign-ups, conversions and more.
With Brilliant Directories, tracking code for the success pages can be placed in a widget selected on each membership plan, or in one widget that applies to all membership plans.
Membership Plans Method
Each membership plan has a setting where a widget with the tracking code can be selected.
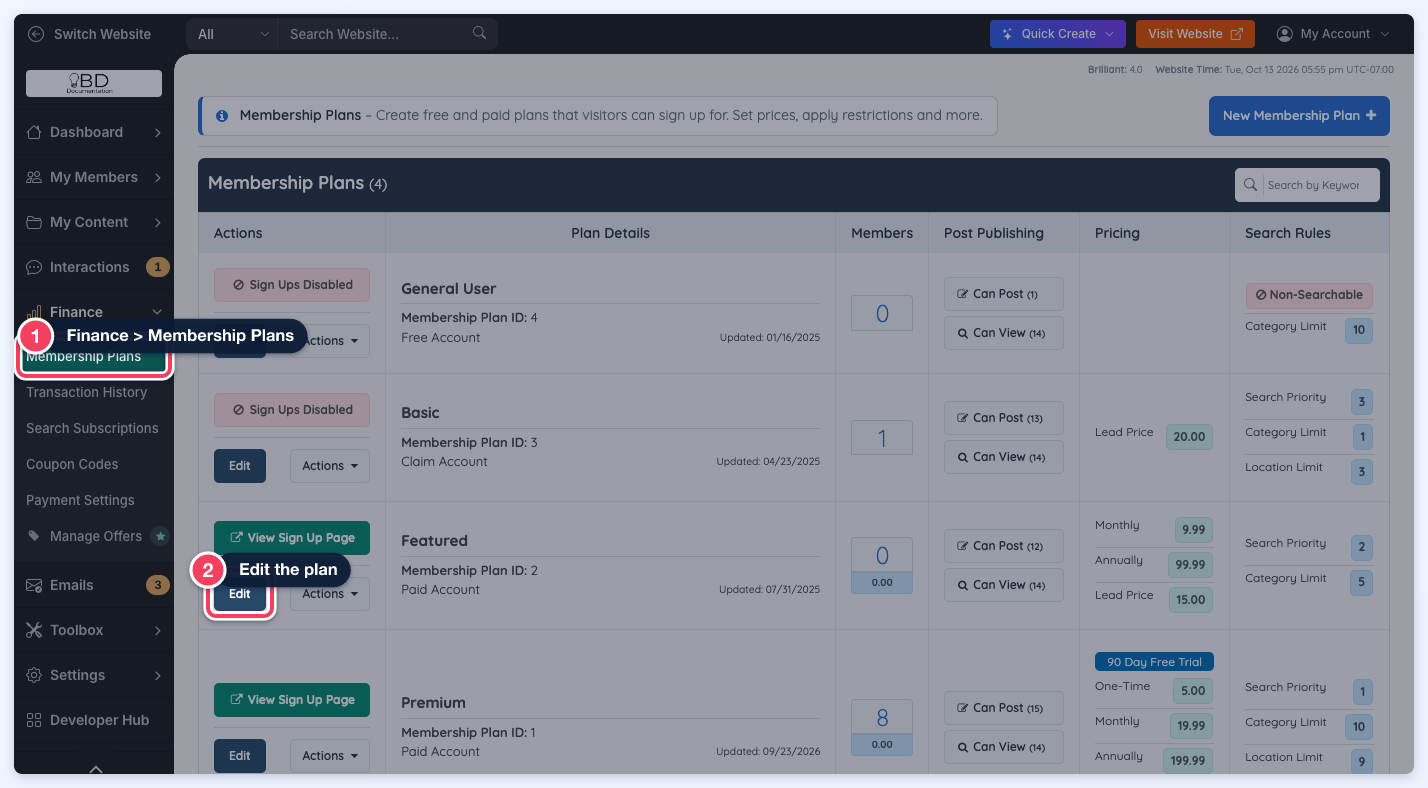
- Navigate to Finance > Membership Plans, find the plan where the code needs to be added and click Edit.
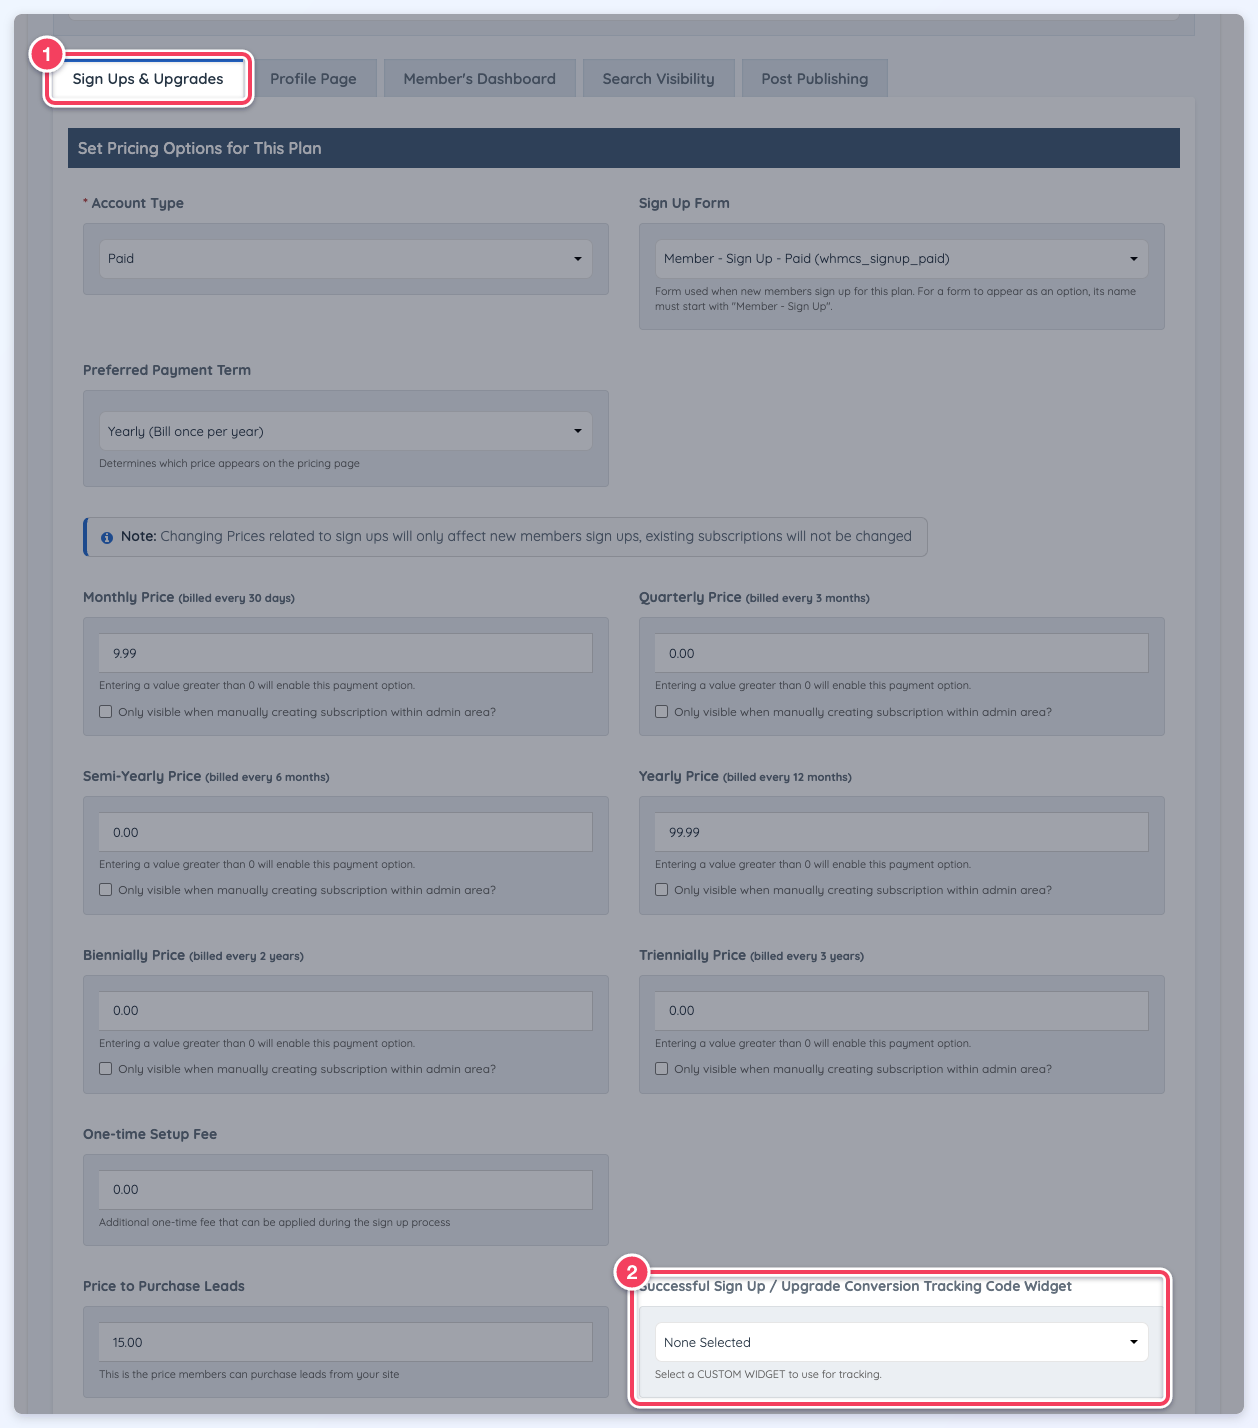
- On the Sign Ups & Upgrades tab, scroll down to Successful Sign Up / Upgrade Conversion Tracking Code Widget and select the preferred widget. Only custom widgets are listed.
- Click Save Changes.
The selected widget works alongside the default Bootstrap Theme - Conversion Tracking Codes widget, which always remains active.
Conversion Tracking Codes Widget and Available Variables
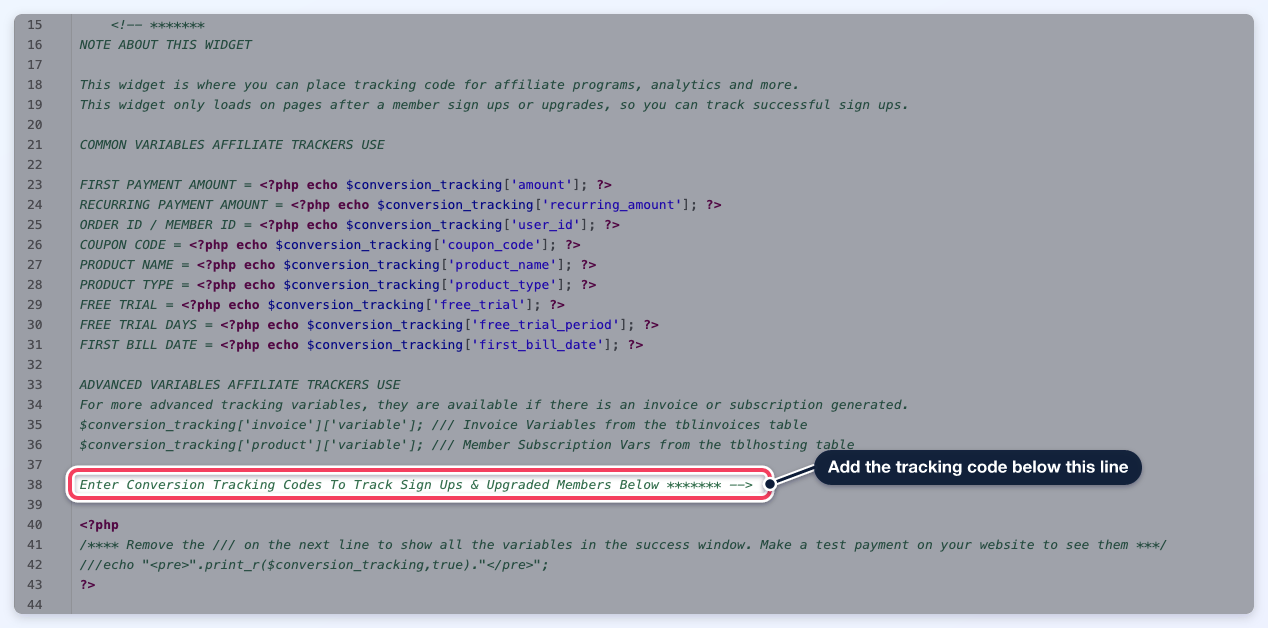
Navigate to Toolbox > Widget Manager, search for Conversion Tracking Codes and click Customize on Bootstrap Theme - Conversion Tracking Codes. Saving the widget creates a customized copy of it for the website.
An example conversion tracking code could look like the following:
fbq('track', 'Purchase', {currency: "AUD", value: <?php echo $conversion_tracking['amount']; ?>});Add the code below this comment in the widget (line 38):
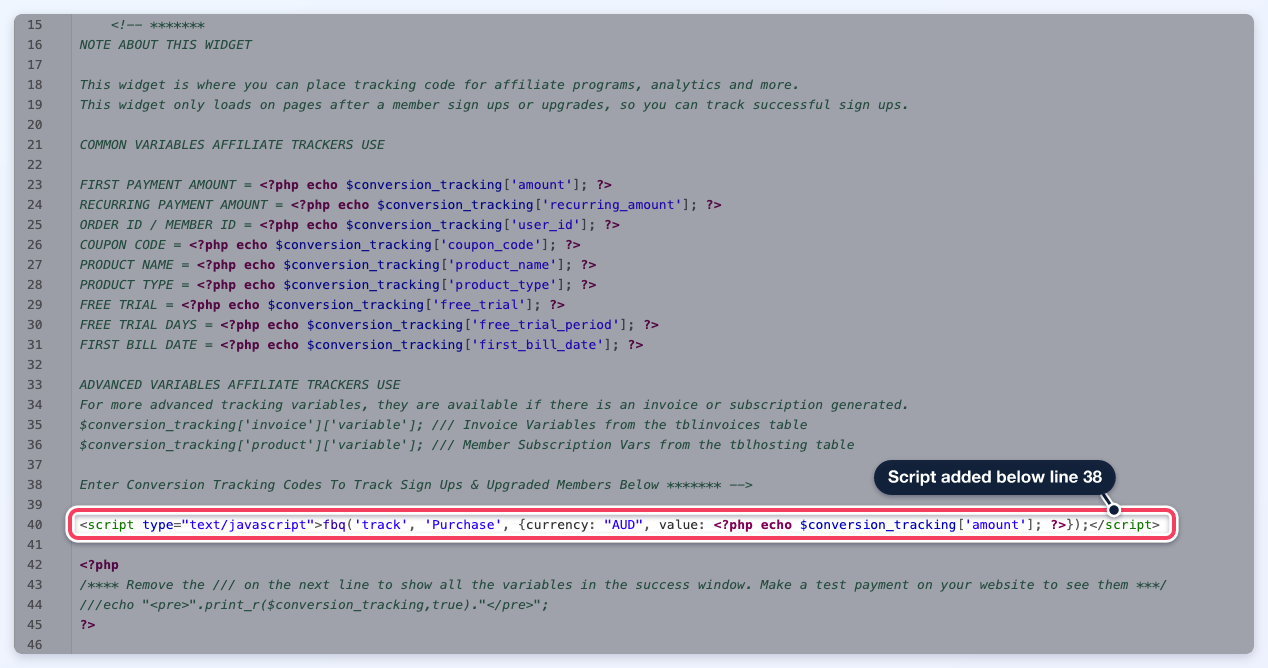
Wrap JavaScript code in a <script> tag, as shown below:
<script type="text/javascript">fbq('track', 'Purchase', {currency: "AUD", value: <?php echo $conversion_tracking['amount']; ?>});</script>The end result looks like the following:
Affiliate programs and other trackers often need the order amount, the order or member ID and similar details in the tracking code. These variables are available:
COMMON VARIABLES AFFILIATE TRACKERS USE:
- FIRST PAYMENT AMOUNT = <?php echo $conversion_tracking['amount']; ?>
- RECURRING PAYMENT AMOUNT = <?php echo $conversion_tracking['recurring_amount']; ?>
- ORDER ID / MEMBER ID = <?php echo $conversion_tracking['user_id']; ?>
- COUPON CODE = <?php echo $conversion_tracking['coupon_code']; ?>
- PRODUCT NAME = <?php echo $conversion_tracking['product_name']; ?>
- PRODUCT TYPE = <?php echo $conversion_tracking['product_type']; ?>
- FREE TRIAL = <?php echo $conversion_tracking['free_trial']; ?>
- FREE TRIAL DAYS = <?php echo $conversion_tracking['free_trial_period']; ?>
- FIRST BILL DATE = <?php echo $conversion_tracking['first_bill_date']; ?>
ADVANCED VARIABLES AFFILIATE TRACKERS USE:
- $conversion_tracking['invoice']['variable']; (Invoice Variables from the tblinvoices table)
- $conversion_tracking['product']['variable']; (Member Subscription Variables from the tblhosting table)
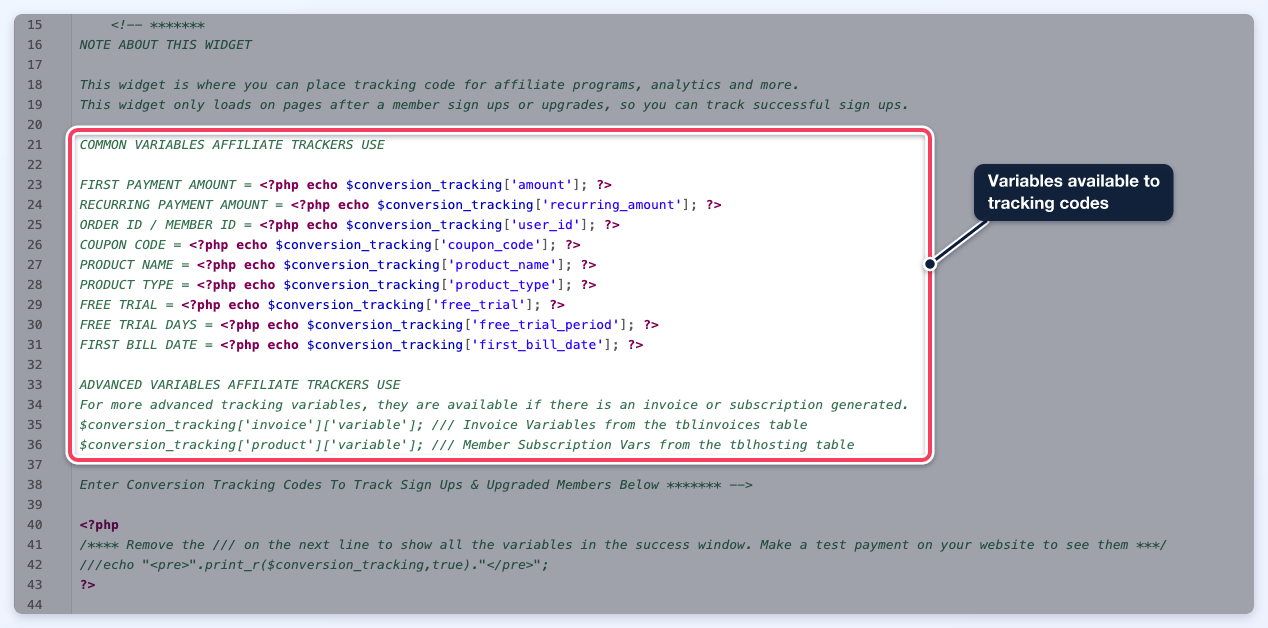
IMPORTANT NOTE: This widget is where the tracking code for affiliate programs, analytics and more can be placed. It only loads after a member signs up or upgrades, to track successful sign-ups.
When a paid sign-up is completed through the Stripe card form, the success message appears in a pop-up on the checkout page. Script tracking codes in this widget (for example a Meta Pixel fbq('track', 'Purchase') call), not only image pixels, run once when that pop-up appears. Scripts run in the order they appear, and an external library tag is loaded before the inline code that follows it. Other payment gateways already ran these scripts, and a declined card runs nothing.
Alternative Method: Adding Conversion Tracking to Pop-Up Success Messages
When a conversion action does not load a separate success page (for example, a pop-up message confirms success on the same page), the conversion tracking code can be placed in the text label shown after the successful action.
This example adds a Google Ads conversion tracking code to the newsletter sign-up pop-up.
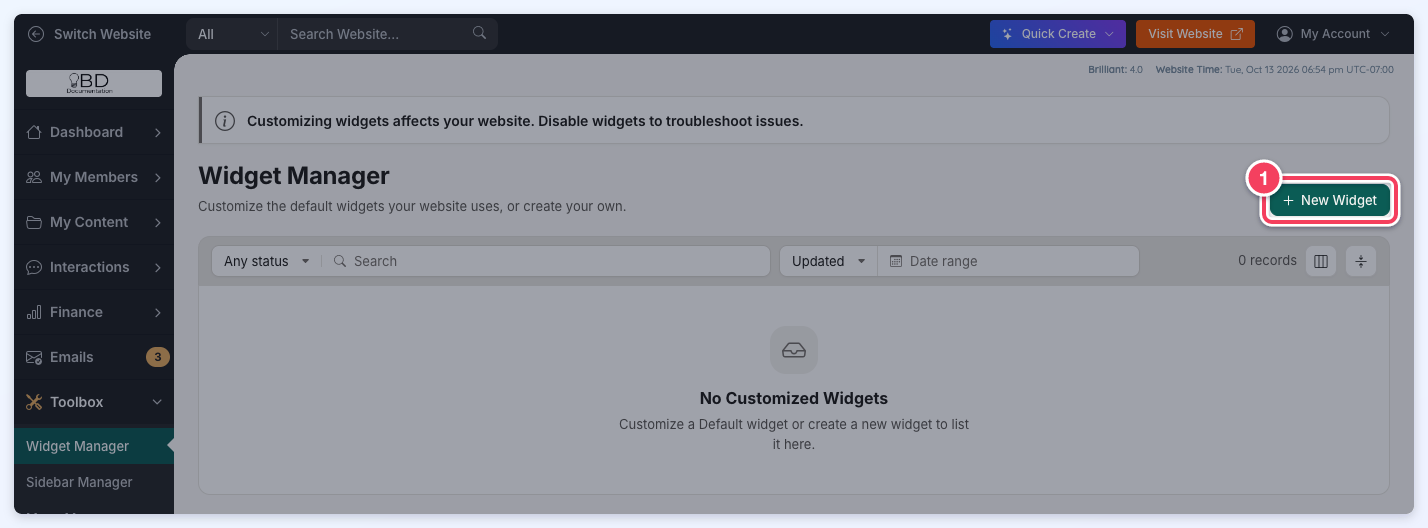
- Navigate to Toolbox > Widget Manager and click New Widget.
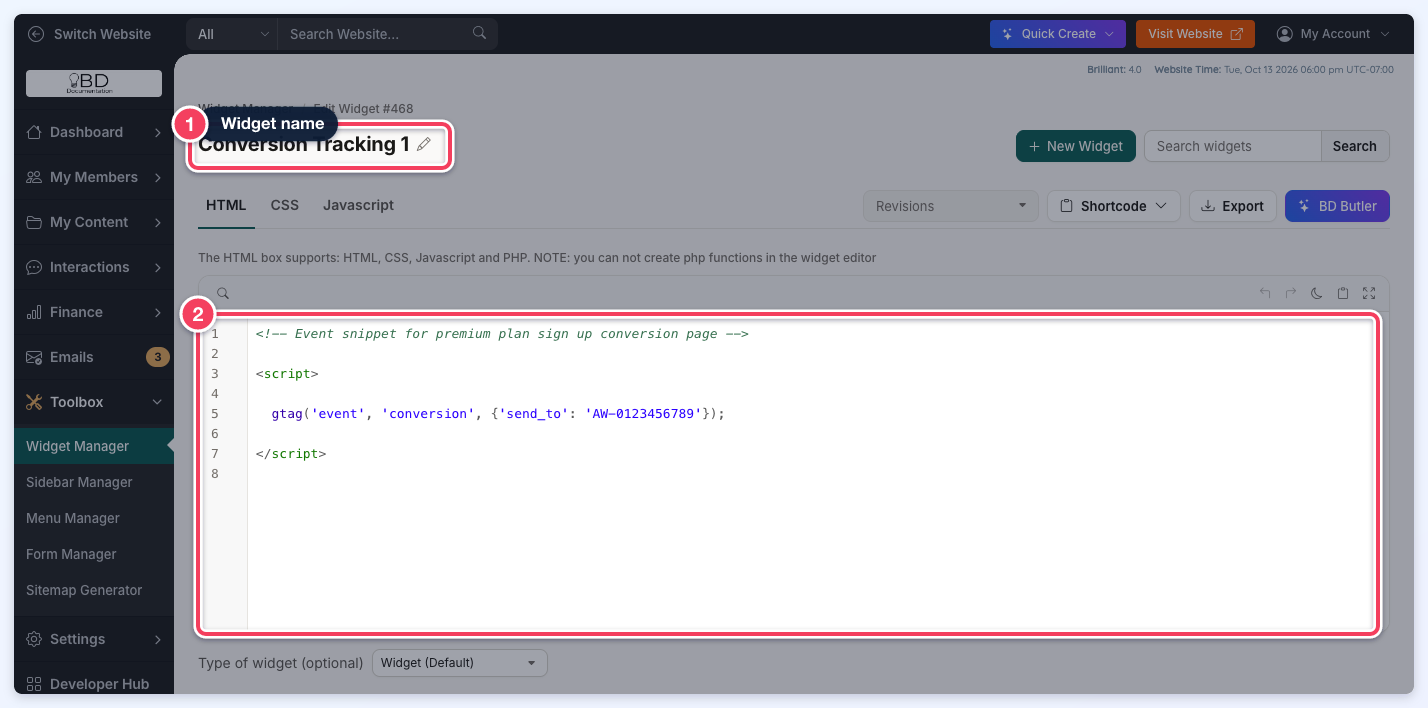
- Name the widget, add the tracking code in the HTML tab and save the widget. The saved widget looks like this:
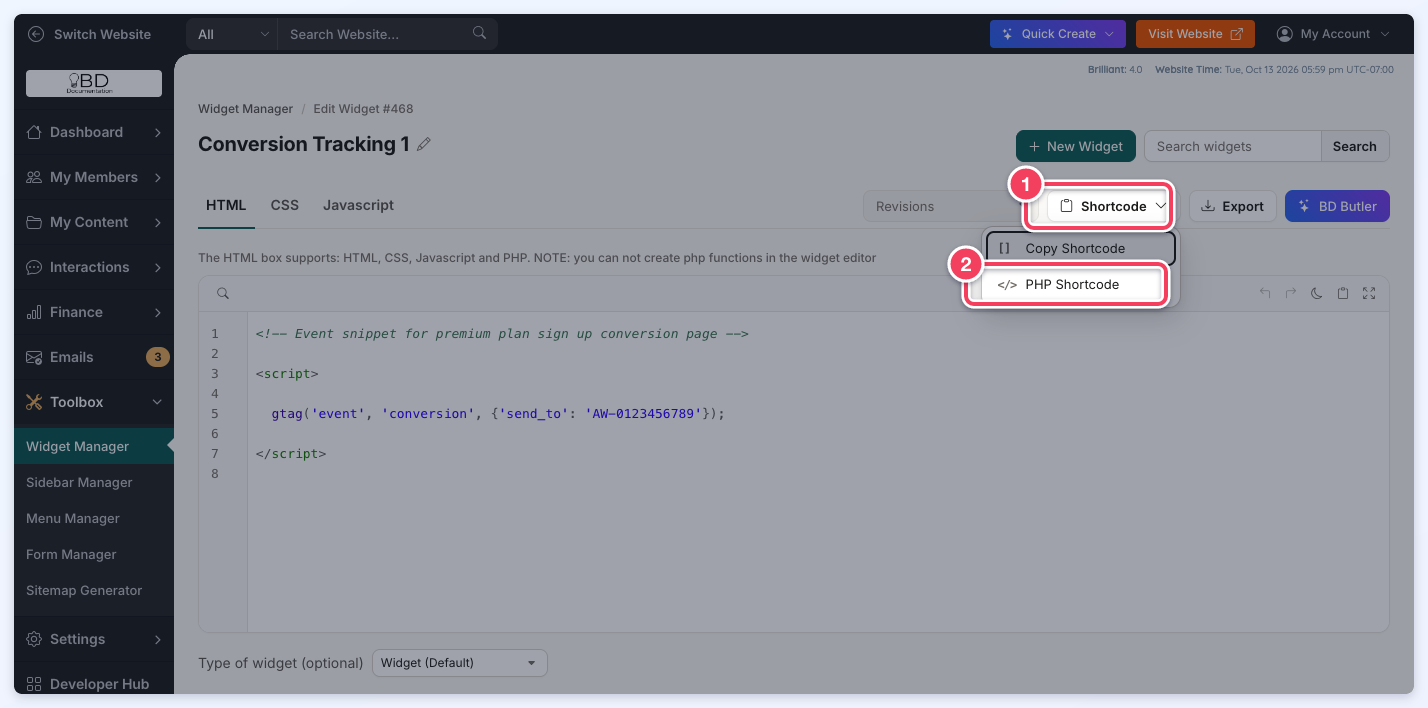
- Click Shortcode and choose PHP Shortcode.
- Navigate to Settings > Text Labels, search for the label of the success message (here thanks_joining_newsletter), paste the shortcode after the message text and click Save.
The code can also be pasted directly into the text label instead of a widget shortcode. The widget method is recommended for more reliable performance and smoother processing.
The tracking code now runs each time a visitor subscribes to the newsletter.
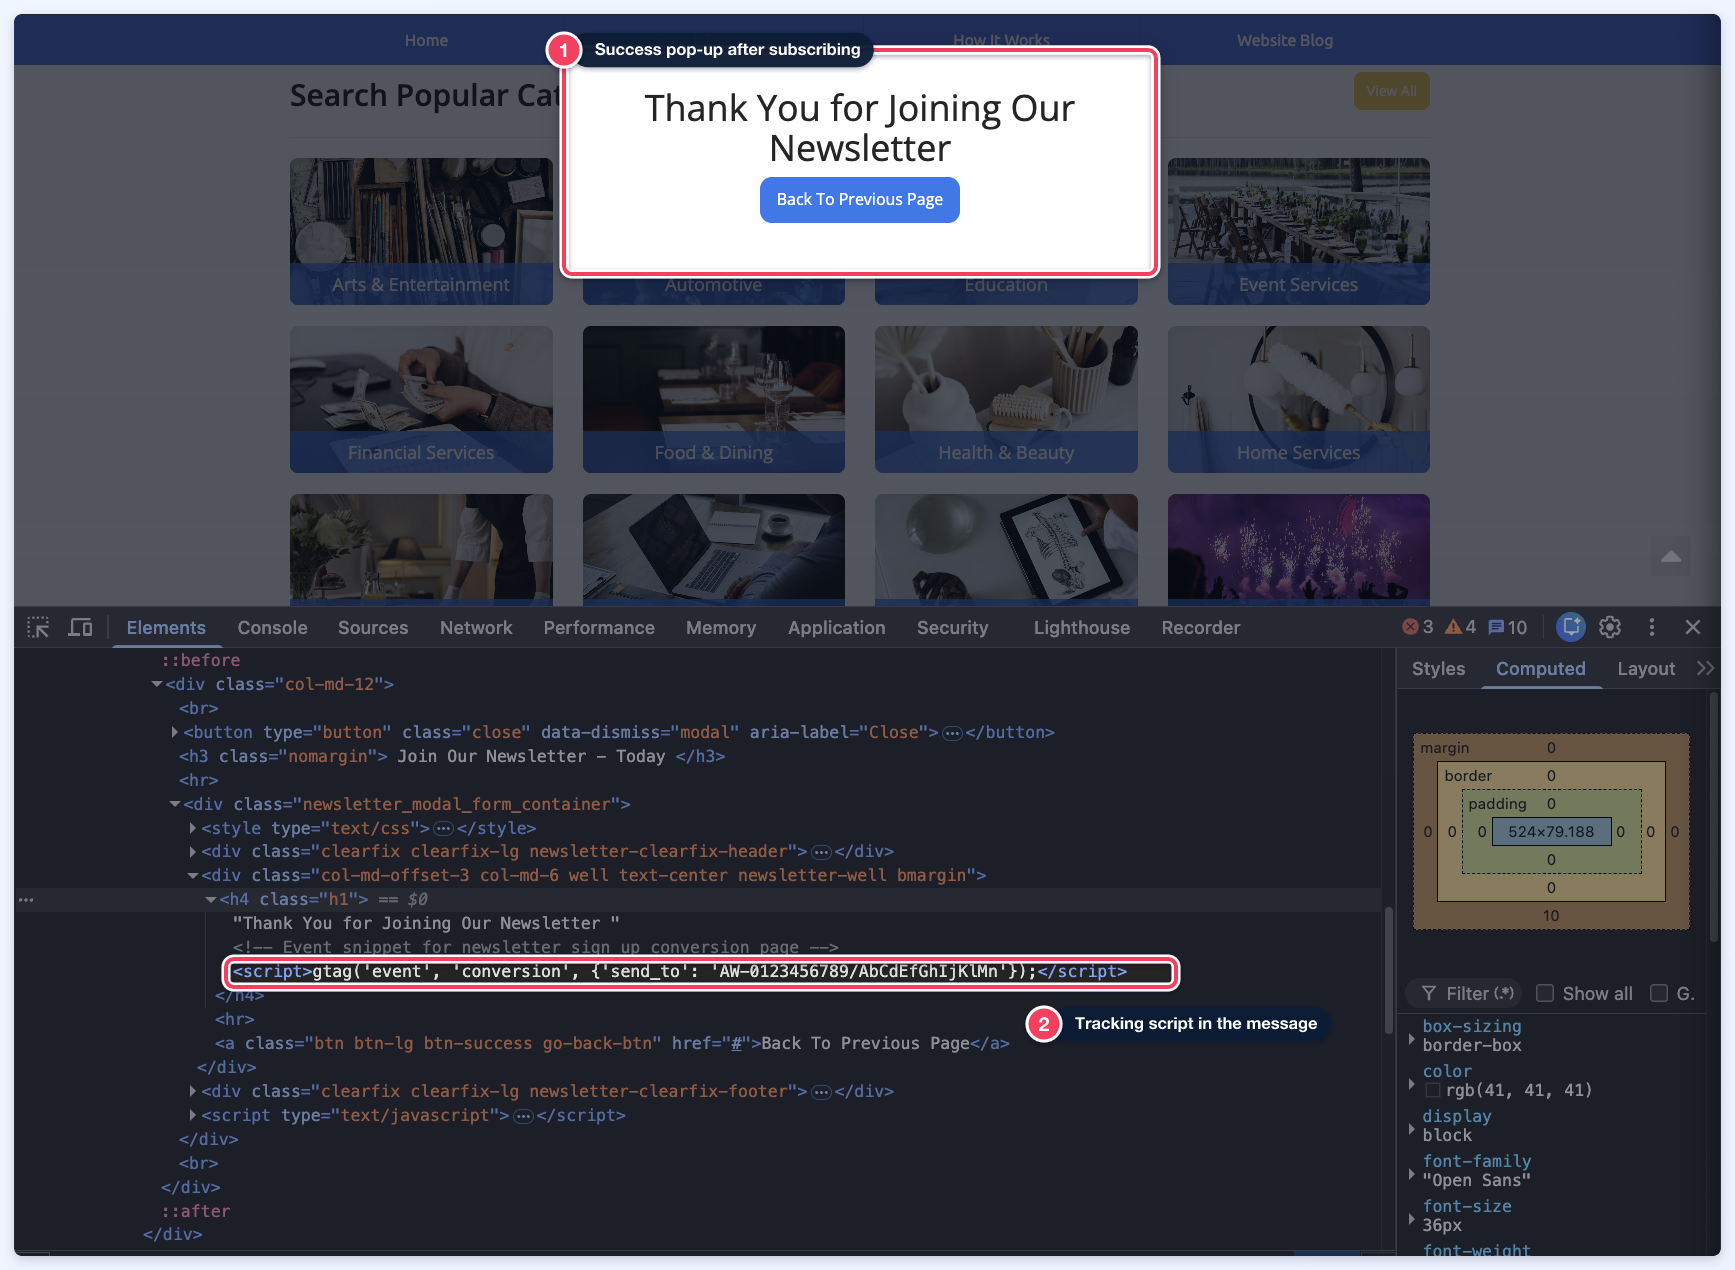
This option is useful wherever the confirmation appears as inline text or a pop-up rather than a new page.
NOTE: This method may not work reliably when the script requires a specific loading sequence or is complex. Test thoroughly before finalizing any updates.
